The following is a step by step guide to customising your SolarSentinel logo image by replacing the logo text with your own organisation or company’s name and logo.
[span class=attention]In order to utilise the Fireworks Source PNG included with the solarsentinel template release, you will need Adobe Fireworks. The 30-day free trial of this software as well as more information is available here at the Adobe website.[/span]
[clear]
One of the first steps of customising your new SolarSentinel template will undoubtedly be altering the logo text to reflect the name of your company / organisation. RocketTheme makes this process a simple one by including both the Source PNG for the template, as well as the font(s) used.
The most effective way to customise the logo is to use the included Source PNG file. When opened in Adobe Fireworks, this file contains all of the Layers in the design allowing you to tweak and change any of the image elements of the template design. The following steps will help you quickly get your new logo ready to go:
Step 1
First, open the solarsentinel-headerfooter-source.png file in Adobe Fireworks. On the right side, you will notice a taskbar named Layers. Inside this column, a list of elements within the source will appear, divided into folders. The first is Web Layers which controls the green slices on the page that are used to export the images. Click the eye which is immediately left to the folder name Web Layers to make it invisible. This allows you to edit the logo.

Step 2
Next, double click on the logo. This will activate the text tool so you can edit the element. Highlight the entire text box with your cursor and type your text instead (such as your company name.)

You will notice the crescent icon above the logo name, you can keep it but in this guide we shall remove it.


Step 3
Next, reactivate the Web Layers slice. As you did in the initial step, select the eye icon to make it visible and subsequently making the slices visible on the canvas. Select the logo slice, either on the canvas itself or in the Web Layers folder. If you find the slice is too small, hover your cursor over the blue points around the slice and drag it to a new size.

Step 4
To export your logo, right click on the green slice that is situated above your new logo. A popup menu should appear with numerous options. The value we want to deal with is «Export Selected Slice…». As the name suggests, this option will export/save this slice only out of the entire source window.

Step 5
If you are new to Fireworks, you may be wondering why it appears that there is only one style variation in the source. This is not the case as we take advantage of the Frame features of Fireworks. You need to simply switch frames to see all the other style variation sources.
There are a few ways to change frames and we will show 2 methods that you can use.
In the right column where you find the Layers toolbar including the Web Layers area, you should see another tab/toolbar named Frames. Just left click on the title Frames to enter the frames area. Then you can click on either of the frames which are named to show which style variant is on that particular frame.

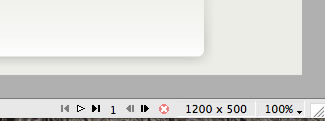
The second method is the most easiest and simplistic. At the bottom of the Fireworks canvas is a row of buttons, arrows just as previous and next. Select the arrows to switch between frames.

[span class=attention]By default, the source should set the export file format to PNG32. If this is not the case, you will need to change your Fireworks export settings. Firstly, expand the Optimise & Align taskbar in the upper right of Fireworks. From the available dropdowns, select PNG32.[/span]
Step 6
Once you have successfully edited then exported your new logo, you will need to upload it to your server. This process is best done via a FTP client such as Filezilla
- Open your FTP client on your local computer.
- Login to your web server where SolarSentinel is installed.
- Navigate to the /templates/rt_solarsentinel_j15/images/header/*style* directory.
- Upload logo.png (and any other logo related images) to this directory (You may need to browse on the local panel in the FTP client to find where you have exported your logo).
- Clear your browser cache before viewing such as using the keyboard commands on Windows, Ctrl+F5.
[span class=attention]
Ensure that you are uploading the correct logo to avoid confusion if it does not change. Also take into account hosting permissions. Sometimes, hosts which are not designed for Joomla may have permissions not suited for the setup, thus, the upload will not be complete. In this case, contact your hosting provider.
[/span]